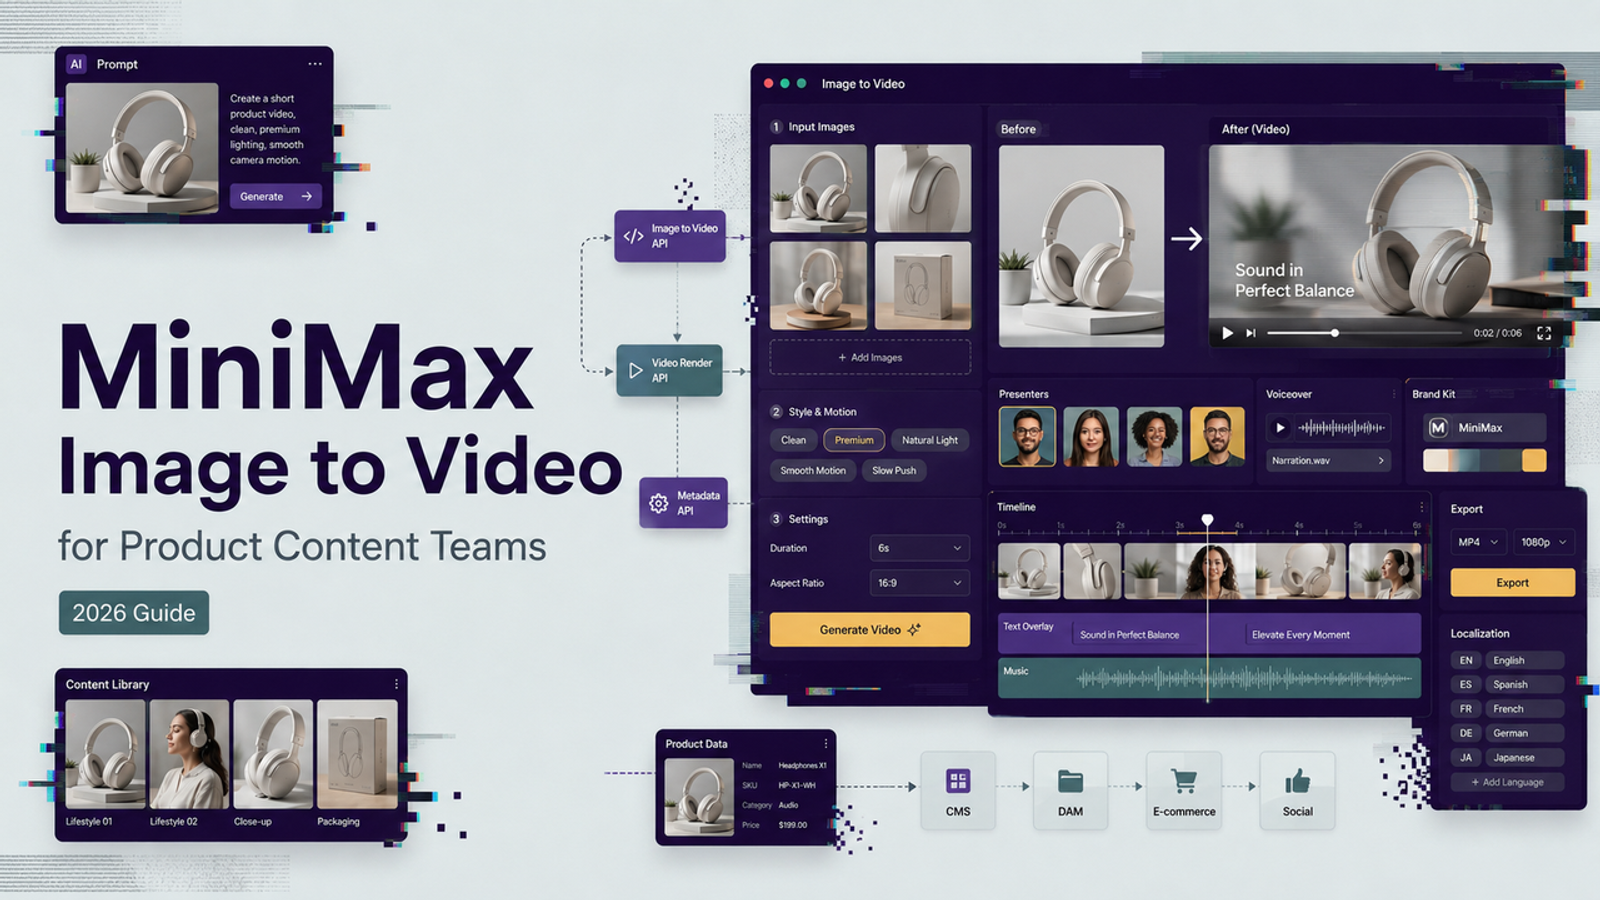
I’m Vela, and I usually test AI video tools in the most boring way possible: one real product image, one short brief, one clear output goal. No perfect demo assets, no “magic button” expectations. For MiniMax image to video, that matters even more, because product content teams do not just need a nice-looking clip. They need a video draft where the product still looks like the product, the logo stays intact, and the team can actually review what changed before anyone talks about publishing.
I would not treat MiniMax image to video as a shortcut from “approved product photo” to “ready-to-run ad.” That jump is too big, and honestly, this is where teams get burned. I would treat it as a controlled way to turn already-approved product images into a small set of reviewable video drafts, then slow down around the details that matter: product shape, label accuracy, logo safety, motion realism, claims, export format, and approval.
For product operators, performance marketers, creative strategists, and agency teams, the useful question is not “Can MiniMax generate a video?” The useful question is: can this workflow help us create a first version worth reviewing without starting from a blank timeline?
What This Workflow Is Designed to Produce
A good MiniMax image-to-video workflow should produce short, controlled video variants from product images your team already has permission to use. That might be a product beauty shot with a slow push-in, a packaging close-up with light movement, a lifestyle-style scene where the product stays central, or a simple e-commerce video draft for internal review.
The key word is “draft.” I would call this a reviewable first version, not a final ad. MiniMax’s official video generation API documentation lists image-to-video as a mode where a first-frame image and a text prompt can guide the output, and it also lists supported image formats such as JPG, JPEG, PNG, WEBP, HEIC, and HEIF. The same documentation describes video generation as an asynchronous task flow: create a task, check task status, then retrieve the video file from the result URL. For teams, that means the workflow should include tracking, review, and version notes, not just prompt-and-download.
Prepare Product Images for Motion
The simplest setup usually works better than the clever one. I would start with one clean product image, one target format, and one motion idea. If the image already contains small label text, shiny packaging, thin edges, or a logo near a curved surface, assume the first generation may soften or bend something. Small thing, but it matters.
Choose the Hero Image and Supporting Angles
Your hero image should show the product clearly, with enough edge contrast for the model to understand the object. Avoid busy backgrounds if your goal is product accuracy. A product on a plain surface is less exciting than a fully styled shoot, but it gives you a cleaner test.
Supporting angles help when the product has details the hero image hides: cap shape, back label, button placement, ports, texture, or scale. I would not throw every asset into the first test. Start with the hero image, then use supporting images only when the workflow supports reference input and you have a clear reason for each one.
Protect Logos, Labels, and Product Details
Logos and labels are where image-to-video quality control gets very real. AI motion can make a package look alive in a good way, but it can also make text crawl, bend, blur, or invent extra marks. For e-commerce video production, that is not a cosmetic issue. It can become a brand accuracy issue.
Before generation, decide which parts are untouchable. For example: logo shape, product name, ingredient panel, certification marks, color tone, size relationship, and any legal or compliance text. If a label must stay readable, I would keep motion gentle and avoid asking for product rotation unless you have enough reference angles to support it.
Build a Controlled Motion Brief
The motion brief is where most teams either gain control or lose it. A vague prompt like “make this product video exciting” gives the model too much room to invent. I would write the brief like a tiny shot direction, not like a mood board.
Define the Camera Move and Subject Action
A useful motion brief says what moves, what stays still, and what must not change. For product photo to video work, I like briefs such as: “slow camera push-in, product remains centered, packaging shape unchanged, soft studio light moves slightly across the surface.” That gives the model a job without asking it to redesign the product.
If you need subject action, keep it simple. Steam rising behind a mug, water droplets moving on a bottle, a hand entering frame to place the product down, or a gentle table rotation can all work as test ideas. I would avoid complex transformations, dramatic explosions, or fast camera spins for a first product accuracy pass.
Set Framing, Pace, and Output Format
Frame for the place where the video will be reviewed or used. If the team is testing a TikTok-style concept, start vertical. If the asset is for a product detail page, square or horizontal may make more sense. TikTok’s own ad policy page says ads should use standard video sizes such as 9:16, 1:1, or 16:9, and it also expects ad content to be dynamic rather than mostly static. That is a useful reminder: don’t generate motion just for decoration, but don’t submit a barely moving still either.
Generate a Small Variant Set
I would generate a small set first: three to five variants, not twenty. One version can test a slow camera move, another can test environmental motion, another can test a tighter product crop, and another can test a more social-first pace. This is enough to compare direction without burning time on versions nobody can review properly.
The reason I like small sets is simple: the review workload is real. Every variant needs someone to watch for product distortion, claim risk, brand mismatch, and export fit. If you generate too many versions too early, the team stops reviewing carefully. That defeats the whole point.
Review Product Accuracy Before Style
This is where I slowed down. Style is tempting because it is easy to react to. Product accuracy is quieter, but it decides whether the draft can move forward.
Check Shape, Text, Color, and Brand Consistency
Watch the video twice. The first pass is for obvious usability: does the clip communicate the product clearly? The second pass is for details: did the product shape warp, did the logo drift, did the label change, did the color move away from brand standards, did the packaging gain or lose elements?
I would compare the generated frame against the approved source image, especially at the first second, middle point, and final second. If the first frame looks accurate but the final frame has a bent label or a different cap shape, the video is not ready. Not a disaster. Just not final.
Flag Artifacts and Unsafe Claims
Product teams should also check whether the video implies a claim the brand cannot support. A skincare bottle glowing like it “repairs skin,” a supplement surrounded by medical-looking visuals, or a cleaning product removing stains too perfectly can all create claim problems. The official Hailuo terms say users must independently review and verify AI-generated content before relying on it, publishing it, or distributing it, and that users are responsible for rights, permissions, platform terms, and downstream use.
Revise, Approve, and Export
Revision should be specific. Do not write “make it better.” Write: “keep the logo flat and unchanged,” “reduce camera movement,” “remove invented text,” “keep the bottle cap circular,” or “make the product stay the same size throughout.” The more concrete the issue, the easier it is to judge the next output.
For approvals, I would keep a simple review record: source image, prompt, generation date, variant number, issue notes, approval status, and final export location. If your team has legal, brand, or client review, do not share account credentials just to speed things up. Hailuo’s payment terms say users may not allow third parties to access an account or use account login credentials, so teams should use approved sharing, export, or review methods instead of passing around one login.
Common Failure Modes and Fixes
The first failure mode is product drift. Fix it by using a cleaner image, reducing motion, and naming the protected details in the prompt. The second is label distortion. Fix it by avoiding rotation, choosing a straighter front-facing product image, or accepting that the label may need editing outside the generator. The third is over-stylization. Fix it by removing mood-heavy words and using plain production language.
The fourth is false confidence. A video can look polished and still be wrong. I would rather approve a boring accurate draft than a beautiful product video that quietly changes the item. For product ads, accuracy wins before style.

Conclusion
MiniMax image to video can make sense for product content teams when the goal is controlled motion from approved product images, not instant final ads. The workflow becomes useful when you keep the input clean, write a narrow motion brief, generate a small variant set, review product accuracy before style, and keep approval records.
The bottom line: use it to get off the blank timeline, but do not let it replace product, brand, legal, or campaign review. A reviewable first version is already useful. Pretending it is automatically final is where the workflow gets expensive.